Ever felt the pangs of frustration trying to translate the charm of everyone’s favorite mischievous mouse onto paper?
How to draw Jerry is a quest that often begins with inspiration but gets entangled in the complexities of capturing that elusive essence. You’re not alone in this artistic struggle.
The problem lies in navigating the intricate landscape of Jerry’s features, from his animated expressions to the unique geometry of his form.
In this guide, we’ll unravel the mysteries, diving deep into the intricacies of drawing Jerry. Ready your pencils, for the adventure of artistic discovery awaits.
Materials You’ll Need
To start your Jerry drawing journey, gather the following materials:
How to Draw Jerry: Step-by-Step Drawing Guide
The essence of Jerry’s mischievous traits and playful demeanor can be captured from Jerry’s drawing references. Here’s the step-by-step guide to make you witness Jerry emerging from the paper, a testament to your artistic prowess:
Step 1: Breaking Down Jerry into Geometric Forms
Begin by simplifying Jerry’s complex structure into manageable geometric shapes. Envision his head as a perfect circle, his body as a sleek oval, and his distinctive ears as two half circles.
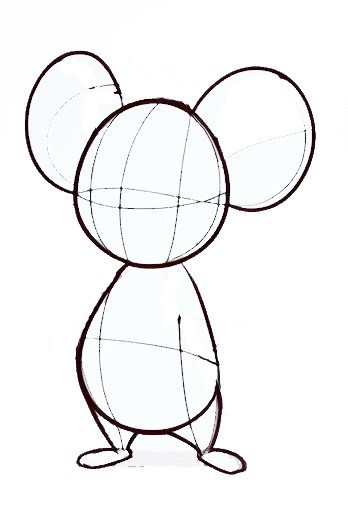
This foundational step lays the groundwork for an accurate and proportionate representation of the iconic character.
Step 2: Sketching the Outline of Head and Body
With the geometric framework in mind, delicately sketch the outline of Jerry’s head and body. Let your pencil glide across the paper, capturing the basic form and proportions established in the initial step.
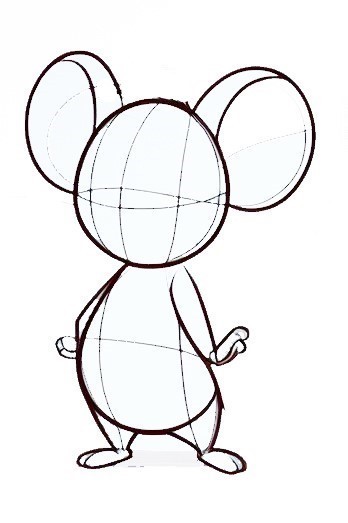
This stage sets the stage for the detailed intricacies to come.
Step 3: Adding Details like Ears and Nose, Tail, Whiskers, and Paw Details
Start adding the details that make Jerry recognizable and endearing. Add details to the perky ears, a twitching nose, and those signature whiskers. Don’t forget the defining elements – Jerry’s playful tail and the subtle intricacies of his paws.
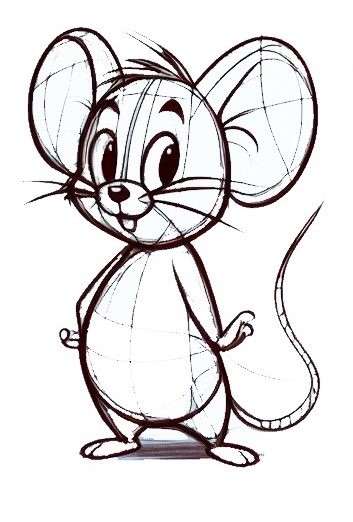
Each stroke brings your drawing closer to the lively essence of the mischievous mouse.
Step 4: Detailing and Shadows
Elevate your drawing by layering in additional details that breathe life into Jerry’s character. Refine facial features, enhance the textures, and pay meticulous attention to shadows.

This step transforms your sketch from a mere outline to a dynamic representation, capturing the nuances that make Jerry truly three-dimensional.
Wrapping Up
In this creative voyage on how to draw Jerry, we’ve unraveled the secrets behind bringing this iconic character to life on your canvas.
The problem of uncertainty in your artistic endeavors dissolves as we delve into the nuances of Jerry’s charm. Agitating doubts are replaced with confident strokes, transforming your sketches into animated masterpieces.
As we conclude, embrace the culmination of newfound skills and creative prowess. Your artistic journey doesn’t end here; it’s a celebration of achievement, a testament to the joy of capturing Jerry’s essence.