Are you intrigued by the challenge of how to draw mushrooms but find yourself navigating a forest of uncertainty? Many aspirants grapple with the elusive nuances of fungi depiction.
In this exploration, we’ll delve into the realm of fungi aesthetics, dissect the common pitfalls, and equip you with the keys to mushroom mastery.
Buckle up as we unravel the secrets, step by step, guiding you from artistic aspiration to fungi fascination
Materials You’ll Need
To start your mushroom drawing journey, gather the following materials:
How to Draw a Mushroom: Step-by-Step Guide
Variations in different mushroom shapes can be obtained from mushroom drawing references. Here is the step-by-step guide to drawing mushrooms, capturing their timeless beauty on paper-
Step 1: Sketching the Simple Shapes
Begin with sketching simple shapes, such as circles and ovals, to establish the foundation of the cap and stem. Connect these elements to form the basic structure of your mushroom.
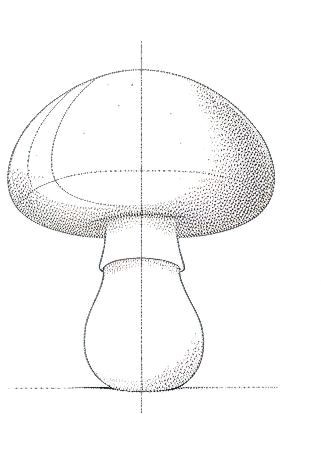
Experiment with the proportions, ensuring a harmonious balance between the cap and stem. This initial step sets the stage for the intricate details that will follow, providing a solid framework for your mushroom masterpiece.
As you sketch, consider the play of light and shadow. Adding dimension to your mushroom at this stage will set the tone for a visually compelling composition. Light source considerations and shading techniques can elevate your basic shapes, adding depth and realism.
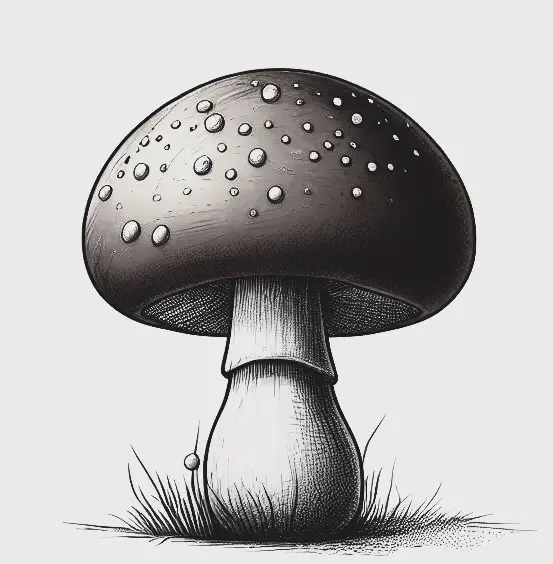
Step 2: Detailing the Mushroom Cap and Stem with Lines and Stippling
Focus on the mushroom cap and stem, employing lines and stippling to create realistic textures.
From smooth caps to textured surfaces, experiment with strokes that capture the essence of each variety. Stippling, the use of small dots, adds another layer of authenticity to your mushroom illustration.
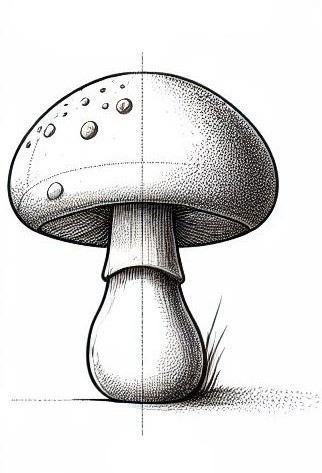
Consider the incorporation of patterns on the cap. Stripes, dots, or any other features can be introduced to infuse personality into your mushroom drawing. This is the stage where your imagination can run wild, giving your fungi a distinct and captivating flair.
Step 3: Adding the Details and Shadows
Now, focus on developing a sturdy stem, making choices between straight or curved, depending on the character you want to convey.
Texture and detail are key elements in showcasing the authenticity of your mushroom. Pay attention to the surface characteristics, whether it’s a smooth or textured stem, adding nuances that bring your creation to life.
Zoom in on the intricacy of the gills. Use lines and shadows to showcase the delicate spacing and patterns, ensuring consistency for a visually appealing representation. This step is where the finer details come into play, contributing to the overall realism of your mushroom illustration.
As you add shadows, consider the play of light throughout your drawing. Consistency in shading enhances the three-dimensional quality of your mushroom, making it visually engaging and captivating.
Troubleshooting Common Mistakes
Mushrooms have a delicate balance, and paying attention to the details during your drawing process will result in a more polished and visually appealing final product. Here is how to avoid a few mistakes while drawing mushrooms-
- Avoiding Disproportionate Caps: Start with a central point. Place a dot to guide the cap’s center, ensuring it doesn’t become too large or small. Use light strokes to outline the cap, regularly checking proportions to maintain symmetry.
- Correcting Uneven Stem Lengths: Begin by drawing a straight line for the stem, keeping it centered beneath the cap. Use your observational skills to ensure the stem remains uniform in thickness and length.
- Managing Shading Overkill: Gradually build up shading, avoiding harsh contrasts that might overpower the drawing. Take breaks to view your work from a distance, ensuring the shading complements the overall composition.
- Avoiding Monotonous Textures: Experiment with various textures on different parts of the mushroom to create visual interest. Don’t stick to one shading style—try hatching, stippling, or cross-hatching for diverse effects.
Wrapping Up
In the grand tapestry of creativity, the journey of discovering how to draw mushrooms has been an exploration of strokes and imagination. As we reach the conclusion of this artistic expedition, reflect on the evolution from novice to connoisseur.
The canvas, once intimidating, now bears witness to the finesse acquired in capturing the delicate allure of fungi. It’s not merely about sketching; it’s about translating nature’s marvel onto paper.
Drawing mushrooms isn’t just a skill; it’s an immersive journey into the intricacies of form and expression, a triumph that echoes in the visual symphony you’ve created.